Из чего можно сделать ведро: Attention Required! | Cloudflare

3 полезные идеи для дома из пластикового ведра

3 полезные идеи для дома из пластикового ведра
После ремонта остается много пластиковых ведер от водорастворимых красок, готовых шпаклевок и прочих отделочных материалов. Обычно вся эта тара благополучно отправляется в мусорный контейнер, но если подойти к вопросу ее утилизации с умом, то можно сделать много полезных для дома вещей.

Плафон для светильника или люстры


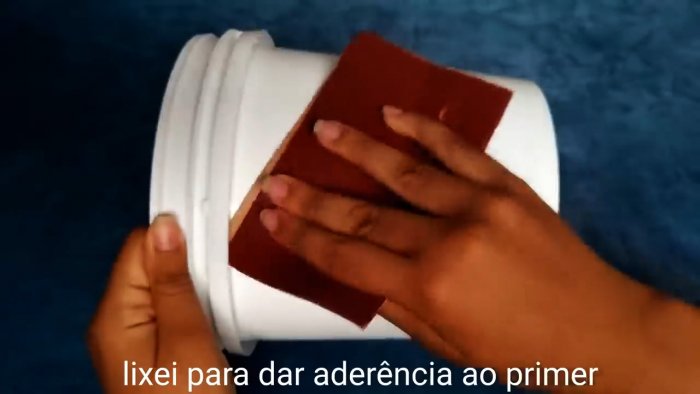
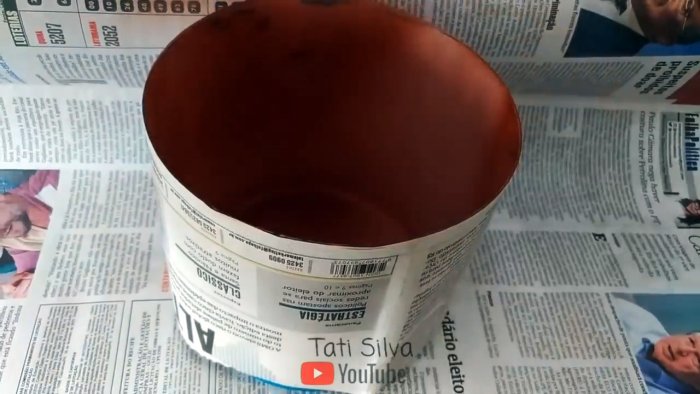
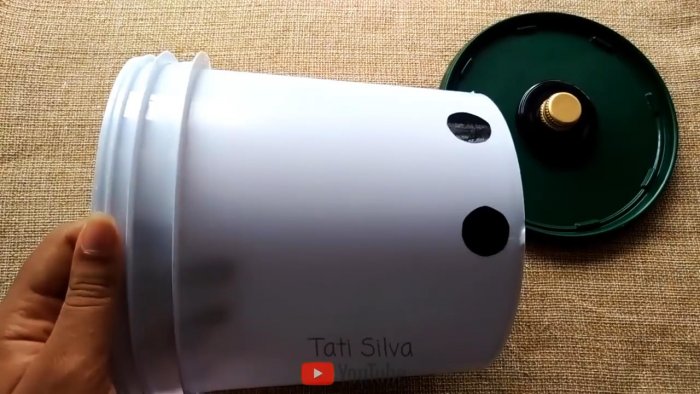
Небольшое ведерко объемом 2-4 л можно использовать для изготовления плафона. Для этого нужно срезать его рельефный ободок и покрасить оставшуюся часть.
Чтобы краска держалась лучше, поверхность необходимо зашкурить мелкозернистой наждачной бумагой до матовости.
3 полезные идеи для дома из пластикового ведра
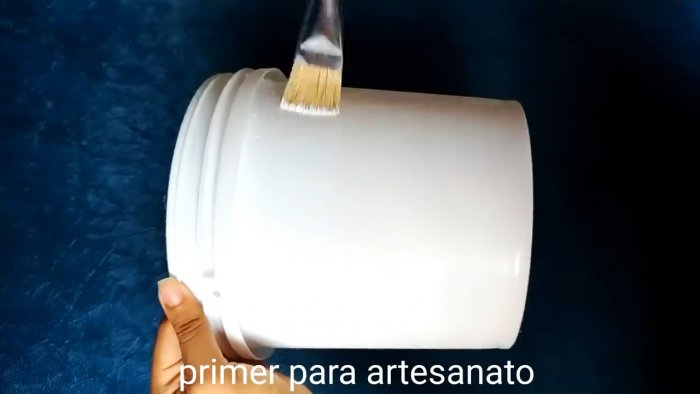
Затем на нее наносится грунт для пластика, а после его высыхания обычная краска.
3 полезные идеи для дома из пластикового ведра
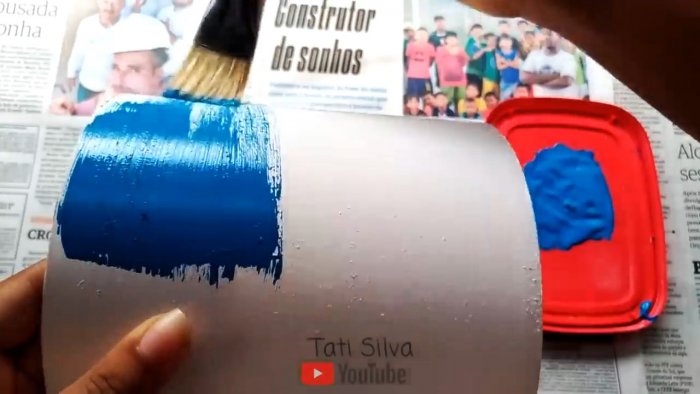
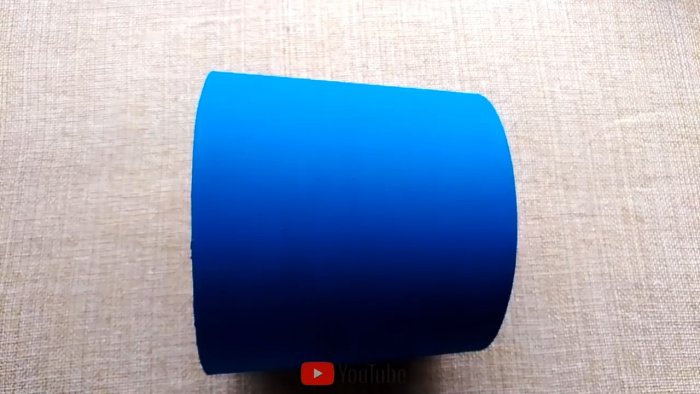
Красить можно как кисточкой, так и из баллончика.
Для лучшего рассеивания света при окраске внутренней поверхности ведра лучше всего использовать светлые тона краски. Обязательно перед этим необходимо закрыть ранее покрашенную поверхность бумагой или малярным скотчем.
3 полезные идеи для дома из пластикового ведра
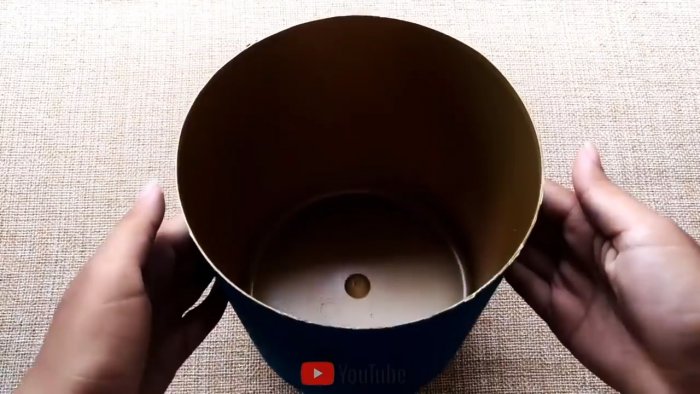
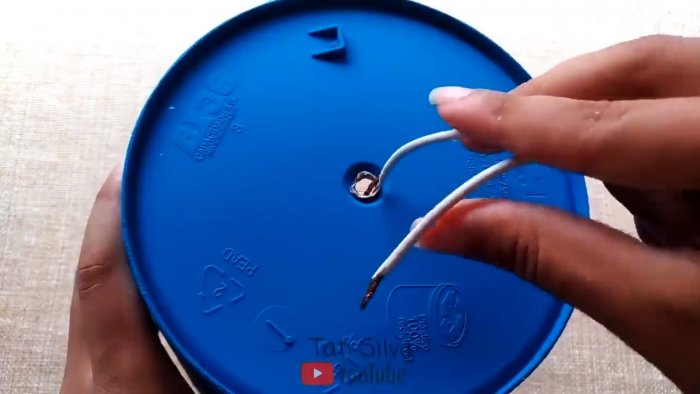
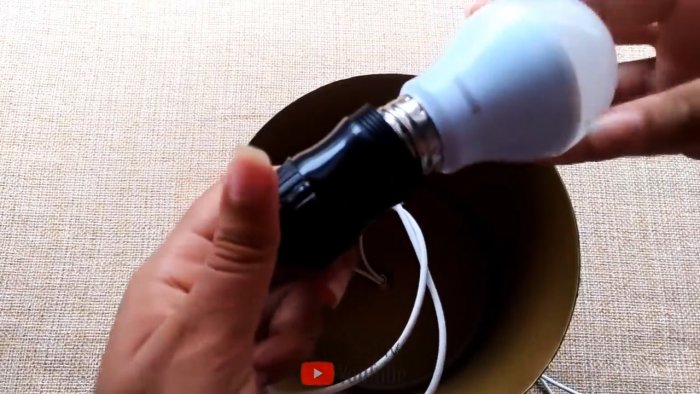
В дне ведра по центру делается отверстие. В него заводится двужильный провод, и устанавливается патрон с лампочкой. Затем самоделку можно подвесить в качестве люстры или светильника.
3 полезные идеи для дома из пластикового ведра

Ведерко для хранения чего-либо


Ведро подходящего объема можно использовать, скажем, для хранения мусора. Маленькое возможно поставить в ванную комнату для сброса в него ватных дисков, ушных палочек, использованных пузырьков от косметики и т.д. Большое ведро может применяться как основное для бытового мусора. Чтобы оно смотрелось аккуратно и уместно, его нужно украсить.
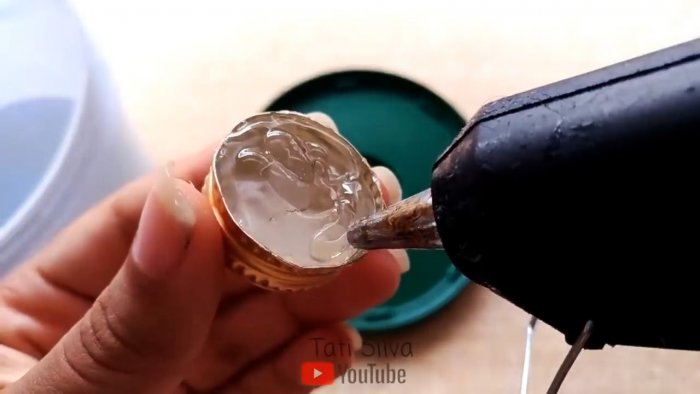
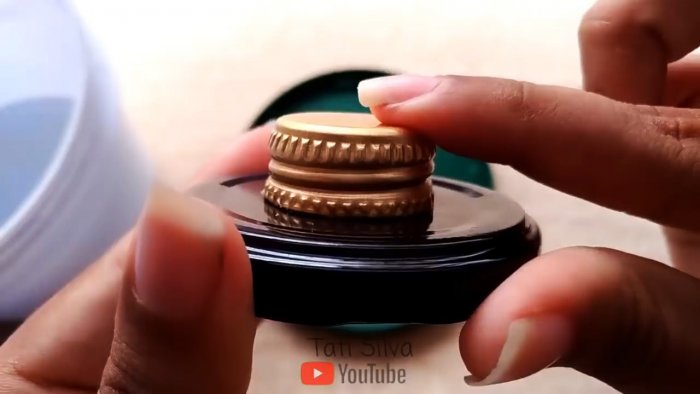
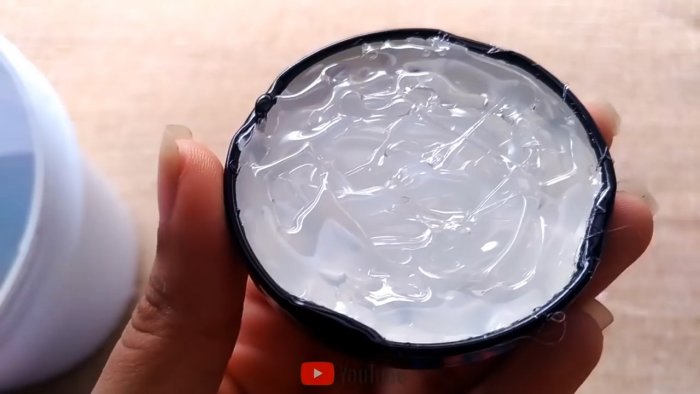
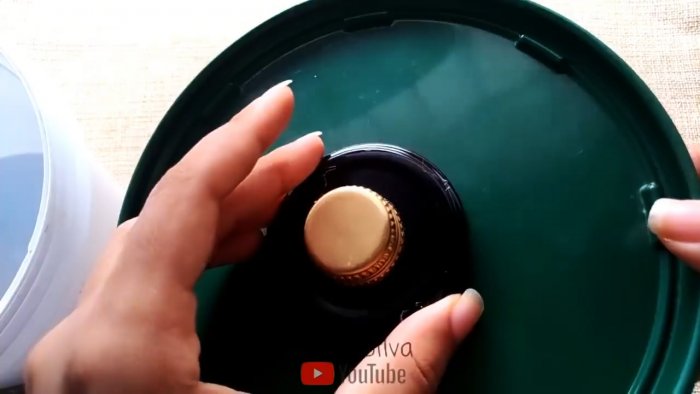
Для начала необходимо сделать ручку для крышки. Для этого с помощью термоклея на нее нужно наклеить крышечку от банки и от бутылки.
3 полезные идеи для дома из пластикового ведра
Затем белый пластик ведра следует покрасить или задекорировать наклейками.
3 полезные идеи для дома из пластикового ведра
В качестве последних могут использоваться вырезки из цветной самоклеящейся пленки для мебели. Из нее вырезаются и приклеиваются на ведро кружки или различные фигурки.
3 полезные идеи для дома из пластикового ведра

Поднос для еды


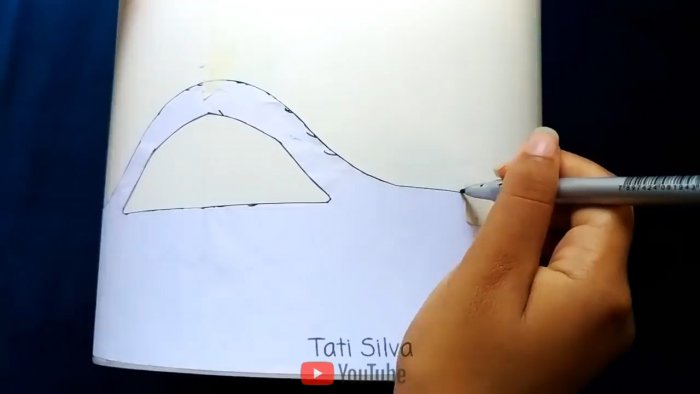
Стенки ведра можно обрезать ближе до дна, сформировав на них ручки.
3 полезные идеи для дома из пластикового ведра
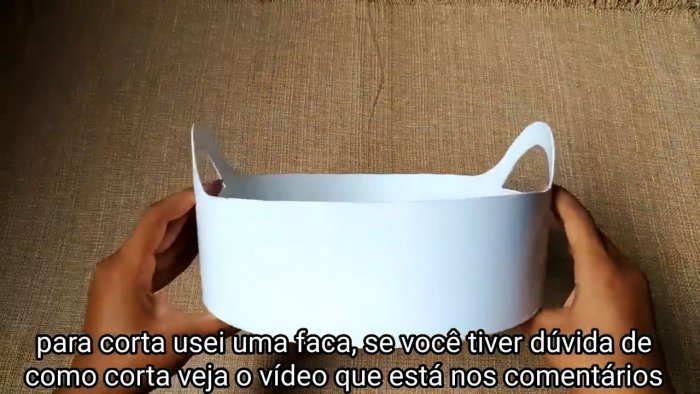
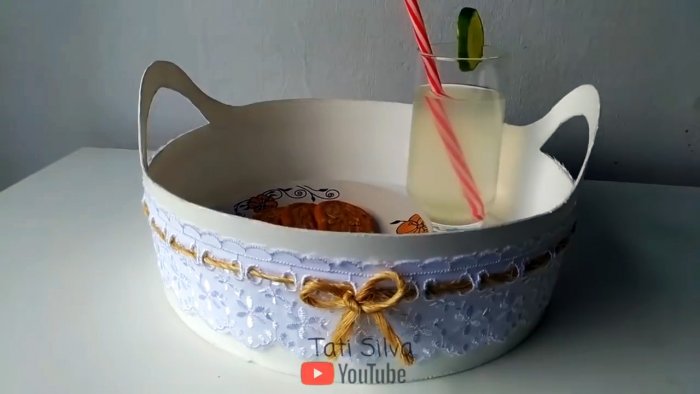
В результате получится корзинка. Чтобы ее украсить, можно использовать полосу кружева. Она приклеивается на корзину с внешней стороны на термоклей.
3 полезные идеи для дома из пластикового ведра
Можно предварительно пропустить через отверстия на кружеве шпагат.
3 полезные идеи для дома из пластикового ведра
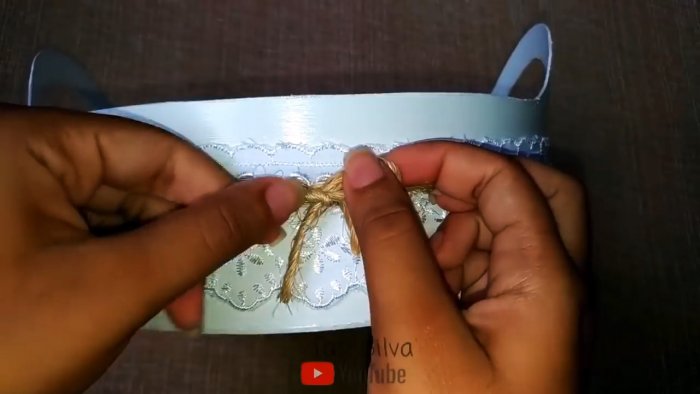
В таком случае его можно будет завязать бантиком на стыке концов полосы, что позволит скрыть шов. Самодельная корзинка может использоваться для хранения пряжи, фруктов или применяться как поднос.
3 полезные идеи для дома из пластикового ведра

Смотрите видео


Как сделать ведро своими руками из жести

Как сделать ведро своими руками из жести, из оцинкованного железа или из нержавеющей стали с прямыми стенками.

Вырезаем из материала развертку изделия

Как сделать ведро своими руками из жести

h – высота (устанавливаем заданную величину)
d – диаметр (устанавливаем заданную величину)
l – длина окружности (находим расчетным путем)

l = πd = 3,14 * 329 = 1033 (мм)
h = 310 (мм)

ИЗГОТОВЛЕНИЕ ЦИЛИНДРА

В середине развертки размечаем отверстия для крепления ушка

Как сделать ведро своими руками из жести

1. На прямоугольном листе из тонколистовой оцинкованной стали ГОСТ 14918-80, на самодельном ручном листогибе, или ручным способом при помощи киянки и бруса, зафальцовываем «по высоте» края листа в противоположные стороны. Сгибаем лист в цилиндр.
2. Скрепляем загнутые края. Равномерно прижимаем полученный шов киянкой или колотушкой по всей длине цилиндра.

3. Чтобы шов остался внутри цилиндра, необходимо провести следующую операцию: поворачиваем готовый шов таким образом, чтобы он находился возле ребра бруса; ударяя киянкой по шву, получаем внешнюю поверхность цилиндра без выступающего шва.

Как сделать ведро своими руками из жести

ОТБОРТОВКА ФАЛЬЦА

Ширина фальца зависит от его назначения: получения замка; закатка проволоки.

Как сделать ведро своими руками из жести

4. Установим цилиндр относительно бруска в первоначальное положение. Обстукиваем молотком и отгибаем фальц.
5. Постукиваем заостренной стороной молотка. Следим за шириной фальца – она должна быть одинаковой.

6. Выравниваем фальц постукиванием тупой стороной молотка.
7. Окончательно отгибаем под прямым углом согнутый фальц.

ЗАКАТКА ПРОВОЛОКИ

Вкладываем кружок по периметру отбортовки,

Как сделать ведро своими руками из жести

сделанный из проволоки, диаметр которого должен совпадать с внешним диаметром цилиндра.

Как сделать ведро своими руками из жести

Округляем круговую кромку и окончательно доводим закатку.

СОЕДИНЕНИЕ ЦИЛИНДРА С ДНОМ

Как сделать ведро своими руками из жести

8. Загнем края у круга и вставим в цилиндр.

9. Легкими ударами заостренной части молотка, загибаем фальц внутрь круга.
10. Крепкими ударами тупой части молотка обстукиваем фальц на брусе, поворачивая при этом цилиндр.
11. Сваливаем фальц на наружную плоскость цилиндра.
12. Если в результате работы получится выпуклое дно, необходимо его выровнять.
13. По самому краю дна, ударяем тупой частью молотка, по всему периметру окружности. Дно при этом выровняется, ребра соединения получат ярко выраженный контур.

Как сделать ведро своими руками из жести

ПРИКРЕПЛЕНИЕ ПРОМЕЖУТОЧНОГО ОБРУЧА

Дно ведра можно прикрепить к промежуточному обручу, а промежуточный обруч прикрепить к цилиндру.

Как сделать ведро своими руками из жести

14. Крепим дно ведра с обручем.
15. Соединяем обруч с цилиндром (корпусом ведра).
16. Отгибаем фальц у обруча.
17. Сваливаем фальц на наружную плоскость цилиндра и основательно постукиваем по периметру всей окружности.

ИЗГОТОВЛЕНИЕ УШКА

Как сделать ведро своими руками из жести

Ушки вырежем из аналогичного материала. Пробьем или просверлим сквозные отверстия: два под заклепки; одно под металлическую ручку.

ИЗГОТОВЛЕНИЕ РУЧКИ

Ручку согнем из металлической проволоки диаметром 5…6 (мм) ГОСТ 18143-72.

Как сделать ведро своими руками из жести

Как сделать ведро своими руками из жести – как видите ничего сложного. Освоив простую модель. Можно перейти к более сложной модели с покатыми стенками.

Заказать чертеж


Поделитесь с друзьями!

Ведро | Вёдра | Как сделать в Майнкрафт

Ведро | Вёдра | Как сделать в Майнкрафт

Как сделать ведро в Майнкрафт: рецепты крафта, ресурсы, фото, хитрости и советы.

Как сделать ведро в Майнкрафт
Ведро Как сделать ведро в Майнкрафт | Скриншот 1 Как сделать ведро в Майнкрафт Ведро Как сделать ведро в Майнкрафт | Скриншот 2 Ведро Как сделать ведро в Майнкрафт | Скриншот 3 Previous Next

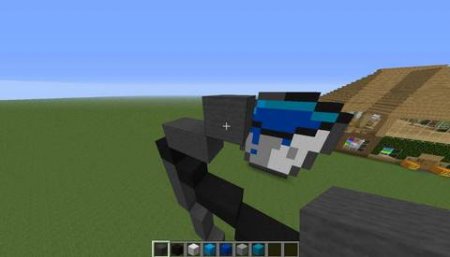
Ведро нужно, чтобы переносить лаву, воду и молоко. Прочности оно не теряет, делается из железных слитков. Готовое ведро можно отыскать в сундуках деревень, кладов, кораблей.

Хитрости и советы


Если плыть под водой и зачерпнуть пустым ведром воды, то на мгновение, создастся воздушное пространство, которого хватит, чтобы заполнить «легкие». Таким образом можно бесконечно плыть по водой. Чтобы снова использовать ведро, просто вылейте воду.

  • Синонимы: Bucket
  • Версии Майнкрафт: 1.16 / 1.15.2 / 1.15.1 / 1.15 / 1.14 / 1.13 / 1.12.2
  • ID: bucket
Ведро в Майнкрафте

Как сделать ведро


Здесь указано, как сделать ведро в Майнкрафте. В рецепте крафта указываются необходимые ингредиенты и их расположение в Minecraft.

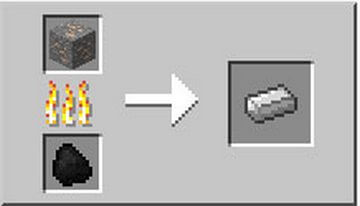
Чтобы сделать ведро в Майнкрафте потребуются: железные слитки. Данные ингредиенты нужно разместить на верстаке, в соответствии с рисунком ниже. Чтобы открыть верстак нужно нажать правой кнопкой мыши на установленный верстак.

Как сделать  в Майнкрафте

Вверх

Где найти ведро


Здесь указано, где можно найти ведро в Майнкрафте, т.е. где можно встретить ведро в Minecraft.

Как сделать сокровищницу в Minecraft

Вверх

Что можно сделать с помощью ведра


Здесь указано, что можно сделать с помощью ведра в Майнкрафте, т.е. где применяется ведро в Minecraft.

Ведро часто используется в игре, и в Майнкрафте можно найти множество рецептов, где придётся использовать данный ингредиент. Из ведра можно сделать иглобрюха в ведре, лосося в ведре, треску в ведре, тропическую рыбу в ведре, ведро молока и ещё 2 шт.

Вверх

Команда получения ведра


Здесь указана команда, которая позволяет получить ведро в Майнкрафте, то есть как в Minecraft создать ведро.

Ведро можно получить с помощью команды в креативном режиме. Для этого нужно:

  1. открыть чат (клавиша “T” английская)
  2. написать команду /give @p minecraft:bucket
  3. нажать клавишу “ENTER” (ВВОД)

Также можно указать количество и кому ведро будут выдаваться:

  1. /give @p minecraft:bucket 10
    получить 10 вёдер
  2. /give MinecraftMax minecraft:bucket
    ведро будет передан игроку с ником MinecraftMax

Команду можно прописать в командный блок, чтобы она исполнялась при получении сигнала красного камня.

Вверх

Видео про ведро


Здесь можно посмотреть видео про ведро в Майнкрафте, то есть подборка видеороликов про Minecraft, где есть ведро.

Вверх

Карты для Майнкрафт

7 способов применить дырявое ведро на даче с пользой

В большинстве случаев письма приходят в течение одной минуты, но иногда для этого требуется до 10 минут. Возможно письмо еще не успело прийти. Проверьте пожалуйста внимательно папку Входящие (Inbox). В некоторых случаях письмо может попасть в папку Спам (Spam).

  Логин или e-mail: Или войдите с помощью этих сервисов:

Как сделать в Майнкрафте ведро и пользоваться им?

В этой статье будет описано, как самостоятельно создать ведро и применять его в течение игры для своих целей. Помимо этого вы узнаете, какие полезные ресурсы можно добыть при помощи этого объекта.

На определенном моменте игры каждый сталкивается с задачей создания данного предмета, независимо от того, новичок он или уже опытный игрок. Поэтому мы с радостью поделимся с вами, как сделать в Майнкрафте ведро и пользоваться им. Ведь весь процесс игры заключается в создании новых предметов для дальнейшего их использования. Существуют такие вещи, без которых можно легко обойтись. А есть и те, которые относятся к наиболее важным, то есть, без которых играть становится в разы труднее. Одна из таких вещей и описывается далее.


Как создать ведро в Minecraft

Зачем нужно ведро в Minecraft?

Задачи, при которых ведро может пригодиться, абсолютно разные. Можно сделать небольшой огород и стать фермером, либо попробовать себя в кондитерском деле, а иногда приходится собирать и перетаскивать различные жидкости. Именно ведро поможет решить многие из проблем, с которыми сталкиваются игроки. В этой небольшой статье будет подробно и наглядно расписано, как скрафтить ведро, а затем самостоятельно приступить к его использованию.

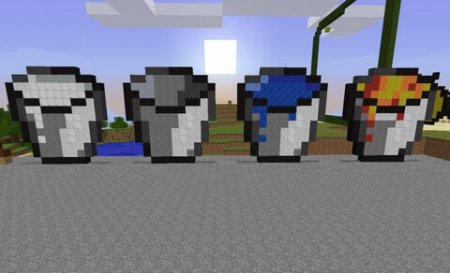
Самое время объяснить, как можно наиболее эффективно использовать данный предмет, прежде чем мы примемся за его изготовление. В этом пункте будут описаны те элементы, для сбора которых игроку обязательно потребуется ведро.


Вода

Конечно, в реальной жизни сразу представляется вода, которую вы туда нальете. Точно так же и в Minecraft – добывайте воду с помощью ведра, ведь это один из самых важных компонентов игры, с которым открываются много новых возможностей.


Вода
  • Самая твердая материя игры – обсидиан, добывается только лишь при помощи воды.
  • Без воды не получится создать пшеничное поле, а без него и свежий хлеб.
  • С водой можно сделать нескончаемый ее источник – нужно разбить три блока и – залить их полностью.
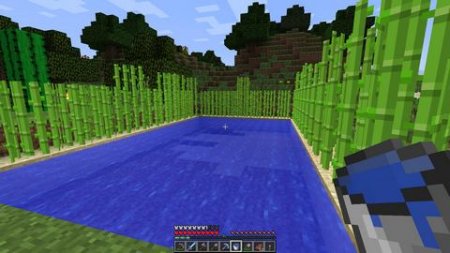
  • Вода поможет создать декор – попробуйте начать с небольшого прудика или фонтана.

Лава

Другой немаловажный элемент игры – лава. Ее можно достать в подземельях и шахте.


Лава
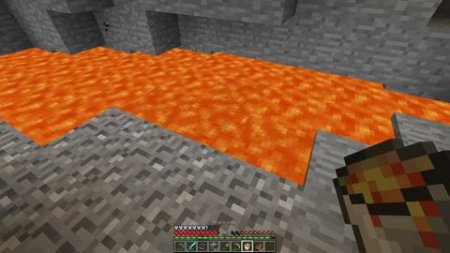
  • Лава используется как источник энергии для печи. Так она намного дольше поддерживает горение.
  • При умелом использовании это хорошее оружие.
  • Как и вода, лава служит и для дизайнерских целей, но еще может освещением в помещении.

Молоко

Еще нельзя не упомянуть и животный продукт – молоко. Можно не только питаться говядиной, но использовать коров, обустроив собственную ферму в целях сбора молока. Сфера применения коровьего молока в игре так же широка, как и у других веществ, собираемых ведром.


Молоко
  • Если было выпито зелье, то его последствия можно снять коровьим молоком.
  • Время что-нибудь испечь! Молоко станет составной частью торта и других изделий
  • Примените хитрость – при помощи молока на участок можно заманить корову, которая обычно не встречается, кроме как в долине или лесу. Поставьте забор и устройте собственную молочную ферму!

Невозможно рассказать о всех возможностях, которые открываются после изготовления ведра. Майнкрафт – это игра, где раскрываются креативные способности, а значит, найти уникальное и по-настоящему нужное применение под силу всем игрокам.


Как использовать ведро в Майнкрафте

Как скрафтить ведро в Minecraft?

Создание ведра не самое легкое дело, на него уйдет некоторое время. Необходимо запастись терпением, несмотря на то, что не так много ресурсов уходит на его изготовление. Определенное время нужно, чтобы создать ведро.


  1. В первую очередь сделайте верстак: в будущем на нем можно будет делать новые предметы для игры. Соорудите печь на верстаке – в ней будут переплавляться руды и слитки железа.
  2. Направьтесь в шахту, чтобы получить слитки железа. Скорее всего, вы уже знаете, как она выглядит. Трех слитков вполне хватит для создания ведра.
    Крафт слитка железа
  3. Вместе с железом стоит добывать и уголь – он пригодится в процессе плавки, которую можно посмотреть на фото рядом.
  4. Расположите слитки в порядке, как на изображении: слева, снизу в центре и справа. Получится треугольник с пустой серединой.
    Крафт ведра
  5. Осталось только скрафтить наше новое ведро, которое сразу станет готово к использованию.

Стоит отметить, что можно попытать удачу и попробовать найти ведро в сокровищнице. Иногда такие поиски дают положительный результат. Но согласитесь: радость и опыт будут не столь обширны, как после самостоятельного прохождения этого пути. Чем раньше ведро будет создано игроком, тем скорее будет облегчен весь последующий процесс игры и возведения новых сооружений в виртуальном мире.


Как скрафтить ведро в Minecraft

Как использовать ведро в Майнкрафт?

Каждый может использовать ведро в нужных целях, но необходимо рассказать и то, как им пользоваться, и что будет полезно для новичков.


  • Если нужно зачерпнуть воду в ведро или вылить ее, то наводится курсор на объект, кликается правая кнопка мыши, и все само автоматически сделается. Нужно помнить, что ведро пригодится только для того, что зачерпнуть воду из источника.
  • С лавой дело обстоит точно так же, как и с водой. В том случае, если все сделано правильно, а ведро по-прежнему пустое, то это не источник лавы, поэтому необходимо продолжить свои поиски.
  • Подойдите к корове и нажмите на нее, если хотите собрать в ведро ее молоко. Щелкните правую кнопку мыши еще раз, и все будет готово – собирать молоко с одной коровы можно без каких-либо ограничений.
  • Если ведро пустое, то его становится очень легко хранить – оно складывается в стопки. Если же оно наполнено чем-то, то лучше поместить ведро в сундук, чтобы сэкономить пространство, отведенное другим полезным вещам.

Ведро воды Minecraft

Вывод

Из этой небольшой статьи мы выяснили, как можно самому сделать ведро в Minecraft. Теперь каждому будет под силу воспользоваться новыми умениями, а также поблагодарить авторов этой подсказки. Будет очень приятно увидеть комментарии и оценку от любого, кто прочел эту статью. Благодарим за внимание и надеемся, что другая информация на ресурсе тоже поможет в дальнейших начинаниях в игре!

Мы ждём Ваши комментарии, смело пишите!

Выбрасываете старые вёдра? Теперь не будете. Вот что из них можно сделать – Сделай сам

Функционал дачных ведер безграничен. Жаль, что век их не бесконечен, и даже с заржавевшими ведрами приходится прощаться… Но что если мы скажем, что у них еще есть шанс на счастливый конец, и им не обязательно отправляться на свалку? Фишки нашли крутые способы реанимировать старые оцинкованные ведра.

1. Размеров ведра бывают разных, но все из них, после долгой службы, легко превращаются в вазу

2.

3. Бум на оригинальные хранения вещей до сих пор актуален, поэтому берите на заметку необычные “ящики”, предварительно ведра можно покрасить. И не беда, если их дно уж с дырами

4. Ведра используют для украшения различных вечеринок и даже свадеб. Добавьте лед – и у вас уже лофтовые холодильники

5.

6.

7. Можно немного зашкурить поверхность ведра и не красить – так будет даже атмосферней

8. Разрезав ведра, вы легко превратите их в лампу

9. Умывайтесь из ведра – как в детстве!

10. Неглубокие и широкие ведра превращаются в оригинальные стулья

11. Не забывайте, что в ведре можно даже приготовить обед

12. Пуфик из старого ведра

13. Повесить такое можно в любой комнате: старенькое ведро впишется в любой интерьер

14. Стол из ванны-ведра

15. А дырявое ведро даже как-то более стильно смотрится

16. Миниатюрные ведерки используют для хранения и подачи блюд в ресторанах

Источник

Понравилась статья? Подпишитесь на канал, чтобы быть в курсе самых интересных материалов

Подписаться
Мастер-класс смотреть онлайн: Мастер-класс: эмалированное ведро в миниатюре

Материалы и инструменты:

  • тонкий картон;
  • краски акриловые;
  • лак;
  • салфетка с мелким рисунком;
  • проволока;
  • нитки толстые;
  • деревянная бусина;
  • клей секундный, клей ПВА;
  • ножницы;
  • циркуль;
  • круглогубцы.

Высота ведра без ручки —3 см.

При помощи циркуля нарисовать две окружности радиусом 11 см и 8 см. По меньшей окружности провести хорду 7,5 см. Для дужек — две детали размером 6 мм на 11 мм, с одной стороны скруглить.

Из картона вырезать детали ведра. Можно использовать коробки от чая, овсяных хлопьев и т.д.

Мастер-класс эмалированное ведро в миниатюре, фото № 1

Секундным клеем склеить деталь по боковому шву.

Мастер-класс эмалированное ведро в миниатюре, фото № 2

Дно смазать клеем так, чтобы немного клея заходило вовнутрь заготовки, поставить на картонку по размеру и крепко прижать. Лучше всего использовать густой клей ПВА либо Момент-гель.

Мастер-класс эмалированное ведро в миниатюре, фото № 3

После полного высыхания срезать картон по окружности дна.

Толстую нить обильно промазать клеем ПВА и приклеить так, как показано на картинке.

Мастер-класс эмалированное ведро в миниатюре, фото № 4

Мастер-класс эмалированное ведро в миниатюре, фото № 5

Детали для дужек согнуть и симметрично приклеить.

Мастер-класс эмалированное ведро в миниатюре, фото № 6

Толстой иглой или шилом сделать отверстия для дужек.

Мастер-класс эмалированное ведро в миниатюре, фото № 7

Покрасить акриловой краской. Чем гуще краска, тем лучше. Для твёрдости нанести несколько слоёв с просушкой. Чтобы не было следов от кисти, последний слой растушевать губкой.

Мастер-класс эмалированное ведро в миниатюре, фото № 8

Последний внешний слой может быть любого цвета.

Мастер-класс эмалированное ведро в миниатюре, фото № 9

Украсить ведро рисунком. Можно приклеить фрагмент из салфетки, для этого вырвать рисунок, отслоить верхний слой и приклеить на клей ПВА. Если фон салфетки не совпадает с цветом ведра, то сделать дорисовку.

Мастер-класс эмалированное ведро в миниатюре, фото № 10

Черной краской обвести ободок ведра, местами имитировать сколы, на которые так же нанести пятна краски цвета ржавчины.

Мастер-класс эмалированное ведро в миниатюре, фото № 11

Мастер-класс эмалированное ведро в миниатюре, фото № 12

После того, как высохнет рисунок, всё ведро покрыть несколькими слоями лака. Можно использовать лак для ногтей.

Сделать ручку.

Отрезать проволоку размером 7,5 см, согнуть её в форме дуги. С одного конца круглогубцами сделать петлю, надеть цилиндрическую бусину, второй конец согнуть под прямым углом.

Мастер-класс эмалированное ведро в миниатюре, фото № 13

Петлю вставить в отверстие для дужки, зажать.

Мастер-класс эмалированное ведро в миниатюре, фото № 14

Вставить второй конец с прямым углом, круглогубцами сделать петлю и после, установить её в отверстии дужки и зажать.

Зафиксировать клеем бусину.

Мастер-класс эмалированное ведро в миниатюре, фото № 15

Ведро готово!

Мастер-класс эмалированное ведро в миниатюре, фото № 16

Мастер-класс эмалированное ведро в миниатюре, фото № 17

Мастер-класс эмалированное ведро в миниатюре, фото № 18

Мастер-класс эмалированное ведро в миниатюре, фото № 19

Мастер-класс эмалированное ведро в миниатюре, фото № 20

Если покрасить серебрянкой, то получится оцинкованное ведёрко.

Мастер-класс эмалированное ведро в миниатюре, фото № 21

Ведёрко в интерьере:

Мастер-класс эмалированное ведро в миниатюре, фото № 22

Точно так же делаются эмалированные кувшины:

Мастер-класс эмалированное ведро в миниатюре, фото № 23

Мастер-класс эмалированное ведро в миниатюре, фото № 24

Мастер-класс эмалированное ведро в миниатюре, фото № 25

90000 Bokashi Compost Buckets: An Easy DIY Method 90001 90002 Most stationary and tumbler-style composters handle plant materials, paper and cardboard, some manures, and the occasional eggshell. Vermicomposters can handle all of those as well as occasional rice or pasta that can gum up a tumbler composter or draw pests if added too frequently. But only one method of composting can handle all of the above as well as dairy products and meats, and that is bokashi composting! 90003 90002 In this post, I’ll show you bokashi composting DIY style from building your bokashi bucket all the way to the finished soil.The only things required to get started with doing bokashi are a couple buckets, some bokashi bran, your kitchen waste, and time. It’s surprisingly easy to do. Best of all, you’re reducing your waste while improving your garden soil. So let’s get this started! 90003 90002 90007 Subscribe to the Epic Gardening Podcast on iTunes 90008 90003 90002 90011 Good Bokashi Supplies For People Who Do not Want To DIY: 90012 90003 90002 [amazon box = “B004GY0C0Y, B01AS6SRE6” grid = “2”] 90003 90016 90011 What Is Bokashi Composting? 90012 90019 90002 90021 90022 90003 90002 The term “bokashi” is Japanese, and it loosely translates to “fermented organic matter”.And in bokashi composting, that’s essentially what you are doing: you’re pickling your food waste. To do this process, you use a refuse product (like bran, wheat mill run, rice hulls, dried spent grain from breweries, or even sawdust or finely-shredded newspaper – anything fine or almost granular) that has been innoculated with EM, or “effective microorganisms”. It’s also sometimes referred to as “effective microbes”. The innoculated product is commonly called bokashi bran, regardless of what it actually is made from.90003 90026 90011 How Does Bokashi Work? 90012 90029 90002 Sprinkle a layer of bokashi bran into either a commercial or DIY bokashi bucket, then add your refuse in layers with bokashi bran mixed into it and sprinkled over the top. Doing this, you slowly build a bucket full of your kitchen waste. You’ll need to regularly drain out any liquid from the bucket so that it does not smell bad. Bokashi is an anaerobic process, which means that it’s done without air, so you must pack your waste down solidly to press out any excess air and keep an airtight lid on the container.90003 90002 Once you have a full bucket, add one last thick layer of bokashi bran over the top, and then place on the lid and put the filled bokashi bucket somewhere to ferment for at least two weeks uninterrupted. When the fermentation process is done, bury the contents of the bucket (commonly called “pre-compost”) in either a trench in the yard or in a prepared bokashi processing box. You can also bury fermented bokashi in a worm composter, add it to a compost tumbler or bury it in a compost pile if you prefer – pickling it makes it less appealing to wild animals, although composting worms love it.90003 90002 The microorganisms will continue their work in breaking down the plant material, and it’s usually gone quite quickly shortly thereafter, leaving you high-quality compost. 90003 90026 90011 What Organisms Are In Bokashi Bran? 90012 90029 90002 Most effective microorganisms come from one of three families: Lactobacillus, Saccharomyces, or Rhodopseudomonas. 90003 90002 Lactobacillus is a very common bacterial family and is known as a probiotic for human use. There’s a wide variety of lactobacillus species, but most of them are beneficial in the bokashi process.They’re commonly used for fermenting food like sauerkraut or making yogurt. 90003 90002 Saccharomyces is the yeast family. Yeasts have been used in fermentation for centuries, and are essential to the making of products like brewed beverages (beer / cider), certain sodas like root beer, and some foodstuff like bread. To do these, yeasts eat protein that’s resident in grains, meats, or other food components, thus breaking it down. 90003 90002 The Rhodopseudomonas family of bacteria is a naturally-occurring resident in soils and some marine environments.In bokashi, it converts atmospheric carbon dioxide into biomass, but it has a secondary purpose as well. One variety of rhodopsuedomonas breaks down lignin, which is a major component of wood and other plant materials. 90003 90002 With these three types of bacteria working on your waste products, they can fully initiate the composting process for pretty much any plant or animal material. 90003 90016 90011 Bokashi Bucket DIY: How To Build Your Bucket 90012 90019 90002 The process of making a bokashi bucket is simple.You will need two five-gallon buckets, something to either slice or drill holes in plastic, one tightly-sealing lid, and a few household items. I find that buckets are relatively inexpensive at big-box stores. Sometimes, you can even get used buckets for free from people in the food service industry! 90003 90002 If you do not want to build your own bokashi bucket, I highly recommend a starter kit such as the 90011 Sunwood Life Bokashi Compost Kit 90012. This kit comes with the bokashi pail, a tamper, both interior and exterior lids, a cup to draw off bokashi tea with, and a countertop compost collection pail with interior liner pail.It also includes a starter bag of bokashi bran. 90003 90026 90011 Creating Drainage Holes 90012 90029 90002 Begin by making sure that your two buckets will tightly and snugly fit together. You want there to be as little airspace between the top and bottom bucket as you can manage. You should still be able to lift one bucket out of the one below it when they’re stacked. Once you’re sure they stack tightly together, take your inner bucket outside with some tools to get started. 90003 90002 Because bokashi compost can still create liquid as the material in the bucket breaks down, you need to have a way to drain out this liquid.For me, that’s by making holes or slots in the bottom of the inner bucket. I used a circular saw for this purpose, but you could also just drill a number of holes in the base of the inner bucket. 90003 90002 The liquid will then collect in the outer bucket as it drains off, creating bokashi tea. This powerhouse liquid can be used in a number of ways, but more on that later! 90003 90002 Using the circular saw, I just cut four slashes in the bottom of the bucket to provide even drainage across the base.If you’re opting to do this method, I highly advise not trying to go through the center part of the bucket as it’s typically tougher to cut through and can break your bucket. Were I to do this again, I’d opt to just drill a couple dozen scattered holes in the bottom, but this method drained extremely well. 90003 90002 Use a piece of sandpaper or a file to take off any loose plastic bits that jut out around the cut edges or drill holes. Then, take your newly-drilled inner bucket and place it back inside your outer bucket.Snug it down tightly. If you find there’s any air space at the top of your bucket, I found that using stacked large rubber bands around the outside of the inner bucket that rest at the joint where the two buckets stack together worked well. The goal is to make the interior of your bokashi bucket as airtight as you can. 90003 90002 If you want to make this more like a commercial bokashi bucket, you can add a spigot to drain off the bokashi tea. It’s not necessary, although it does make it easier to drain.I opted not to for this first bucket, but may in the future. 90003 90026 90011 Picking The Right Lid 90012 90029 90002 Let’s take a moment to discuss lid options. For most buckets, there’s two choices available. First, there’s a snap-on lid like the one shown on the left. On the right, we have a screw-on paint bucket lid. 90003 90002 Paint bucket lids provide a perfectly-airtight seal … once. After that, while the gasket in the lid does give a little extra protection against air getting into the bucket, it also provides a space in which food refuse or other material can build up and get stuck, and the gasket may become loose.Paint bucket lids also cost about twice what normal snap-on lids do, and your bucket needs to be able to handle a threaded lid, which some will not. 90003 90002 I personally chose the snap-on lid, and it worked just fine for this purpose. But if you do not mind regularly cleaning off the gasket to remove any bits of bokashi or specks of food that might have gotten worked up in there, the paint bucket lid’s great too. 90003 90016 90011 Loading And Maintaining Your Bokashi Composter 90012 90019 90002 Now that your basic DIY bokashi bucket is ready, it’s time to get to the actual bokashi composting process! 90003 90026 90011 Lining Your Bokashi Bucket 90012 90029 90002 Take your lid and lay it on top of a scrap of fabric or wire mesh.I used a piece of old landscape fabric, but you can opt to use old T-shirt material, kitchen towels, some fine hardware cloth, or any number of other options. Roughly cut a square that’s just a bit larger than the lid. This will provide a barrier in your bucket to keep any soft material from getting stuck in your drainage holes or slots. 90003 90002 Place your material in the bottom of the bokashi bin, being sure that it goes a little up the sides. At this point, it’s time to add some bokashi bran.90003 90002 I chose a commercially-prepared bokashi bran from 90011 Bokashi Brothers 90012. This high EM bokashi has been double-fermented to thoroughly innoculate the bran with plenty of effective micro-organisms. It’s then dried to create an easy-to-use option. However, you can make your own bokashi bran using liquid EM1 solution, or even by culturing your own effective microorganisms. For simplicity’s sake today I’m going to show you how to work with pre-prepared bran, though! 90003 90026 90011 Filling Your Bokashi Bucket 90012 90029 90002 Once your material is in place, take a couple handfuls of bokashi bran and sprinkle it inside to create a fine coating at the bottom of your bokashi bucket.This provides a kickstart layer of EM for your food waste. 90003 90002 Now it’s time to start adding your food waste – and that means almost any leftover food you have on hand! 90003 90002 The more finely you hack up your waste products, the quicker it will break down after being fermented. To start off my bucket, I hacked up the rind of a watermelon and then added some leftover onions from the previous night’s dinner. You can also add leftover bread or pasta, meat scraps, bits of cheese, salad that’s gone past its prime … you get the idea.90003 90002 For each inch of material, add more bokashi bran. I just sprinkle it liberally across the surface of the food waste, trying to get a good spread so that the EM can get to work on the waste. If I’m adding the EM to something very dry, like stale bread, I use a spray bottle first to mist the top surface of the bread with water. I’m not trying to soak the bread down, just providing a damp surface for the EM to work its way into. 90003 90026 What You Should Not Add To Your Bokashi Bucket 90029 90002 The only food items you should not add to your bokashi bucket are oils or large bones.This is not because they will not break down, because they will. Oily materials take a whole lot more bokashi bran to process. The oils are very slow to break down, and liquid oil itself will just go straight through the drainage holes in the bucket without composting at all. Extremely large bones will also break down, but they are very slow to process. Small bones like chicken bones or the like tend to be a little quicker, but are still going to be around for a long time. 90003 90002 It’s also a good idea to not add food that’s gone bad.If you have a container of unidentifiable something in the fridge, that might be best put directly in the trash. This is not because it will not compost, because it will. However, whatever has invaded that container might also take over the entire bokashi bucket. You’re trying to make pre-compost, not do science experiments! 90003 90002 While some people would like to compost their pet waste, that’s not the best idea in your regular bokashi bucket. Pet wastes come with many potential risks. Pet waste often has harmful bacteria in it, and may also be infested with worms and the like.If you do want to try to compost your pet waste, make a dedicated bucket for it – and never, ever, use that compost near any edible crops. But to be honest, I do not recommend doing it, even if you’re trying to reduce your waste stream. Opt for other ways of disposing of the pet products. 90003 90026 90011 Keeping Air Out Of Your Bucket 90012 90029 90002 Bokashi is an anaerobic process. This means it happens in the absence of air, and it’s important for you to keep out as much air as you can.90003 90002 When you have added food waste to the bucket, and sprinkled it liberally with bokashi bran, you should use a potato masher to pack down the waste tightly. This helps reduce the air in between the remnant food. Then, use something as a top cover to sit directly on top of the food. I found an old plate at a thrift shop that I use as a cover, along with some plastic wrap. 90003 90002 In the photo above, you can see paper. I used that for the purposes of the photo because the plastic wrap just would not show up.Cut a piece of plastic wrap that’s larger than your plate, press it down into the bucket on top of the food waste to help keep air out, and place the plate on top of it. Then tightly put the lid on. 90003 90002 It’s important to only add food waste to your bucket when you have enough to create a layer. I have a compost bin on my kitchen counter where I put my kitchen scraps, eggshells, coffee, and the like. When the container is full, I’ll open up the bokashi bucket, sprinkle in a little fresh bokashi bran, and add the new layer.Then, bran goes overtop, I’ll pack it down, put the plastic wrap and plate on top, and close it up quickly. This helps prevent cross-contamination. 90003 90026 90011 Bokashi Tea: What To Do With Bokashi Liquid 90012 90029 90002 Bokashi tea is the liquid that gathers in that outer bucket over time. This liquid comes out of the food waste as it slowly ferments in the bucket, drains through your fabric and down into the bottom bucket. It’s innoculated with some of the EM from the bran, and may have a light vinegary odor to it.90003 90002 It’s also really useful stuff. While I do not personally use it as a liquid fertilizer, many people report good results when mixing the bokashi tea 50/50 with water and using it as a soil drench in their garden. If you plan on doing this, you’re going to want to do this every day or two, because you’ll want to use it when it’s fresh. Otherwise, it will start to develop a whitish mold on the top. 90003 90002 What I opt to use it for is as a microbial drain cleaner. Pouring the liquid down my kitchen sink has helped to keep my pipes free of food particulates, because the microbes grab onto any food waste in the pipes and start to break it down, freeing it from whatever it’s stuck on.To do this, you will need to directly pour your bokashi tea down the drain and let it sit in there for at least an hour or two, then rinse. Repeating this regularly will help the EM to break down any residual food that’s stuck in the pipes and will help you keep them clear. 90003 90026 90011 What Happens If You Get A Contaminated Batch 90012 90029 90002 So what happens if you open up your bokashi bucket one day to see greenish or blackish mold forming? Is this bad? 90003 90002 Actually, yes, it’s bad.This means that something other than your beneficial microbes has gotten into the bucket. That could be any number of other bacteria or fungi starting to attack your compost, and it needs to be dealt with quickly. The only mold color you should see in your bokashi bucket is white mold, and white mold is a sign that your bacteria is doing its job. 90003 90002 To fix this, use a paper towel to wipe clean any surfaces of the bucket that have started to show signs of infection. Once that’s done, spray a second towel with a Lysol-type cleaner, or moisten it with rubbing alcohol, and wipe down the inside of the bucket with that as well to sterilize it.I also usually clean off the plate and replace the plastic wrap if this happens, just to provide a clean upper surface. Try to avoid getting food waste on the sides of the bucket in the future. 90003 90002 If any of the greenish or blackish mold has formed on the food waste itself, you can either try to overwhelm it with EM, or remove it entirely. Either use a lot more bokashi bran and coat it entirely with the bran, which should take back over, or remove the molded surface and dispose of it normally.Coat the remaining bokashi with a thick layer of bran and go back to business as normal. 90003 90026 90011 How Long Does Filling The Bucket Take? 90012 90029 90002 This question is a tricky one to answer, and it’s because it partially depends on how long it takes for you to produce food waste. 90003 90002 If you produce very small amounts of food waste, it’ll feel like it takes forever to fill the bucket, and every couple days you’re draining out liquid. In cases like that, using a bokashi bin made out of smaller buckets is probably a good idea.You can find 2 gallon buckets at food service locations on occasion, or you can buy a commercial bokashi composter. 90003 90002 If you produce large quantities of food waste, this process can go a lot quicker. It may also go faster during the summertime when there’s an abundance of fresh fruit and vegetables, and thus a lot more fruit or vegetable remnants. My first 5-gallon bokashi bucket took me a month and a half to fill, and my second one took about three weeks. So be prepared to be flexible and patient.You will eventually get it filled up, and as long as you add bokashi bran every time you open that lid, you’re ensuring the EM will keep doing its job properly. 90003 90026 90011 What To Do When The Bucket Is Full 90012 90029 90002 Once you have filled your bucket and can not fit any more food waste in it, put a nice thick coating of bokashi bran over the top. Use about double what you would normally use when you’re adding a layer. Then seal up the bucket as normal and leave it alone for at least two weeks, unopened.My first bucket actually sat untouched for about a month. 90003 90002 During that two to four week period of time, the bokashi will continue to ferment through all the layers, pickling your waste. The microbes are hard at work during that time, and are weakening the structure of the food inside the bucket. 90003 90002 When you finally reopen it again, you may see a layer of whitish mold on top of the food. That’s good! That’s a sign of a healthy microbial colony. At this point, the contents of your bucket are now bokashi pre-compost.90003 90016 Converting Pre-Compost To Finished Compost 90019 90002 It might not look like a whole lot has happened to the contents of this bucket, but it definitely has. 90003 90002 If you look closely, you’ll see a whitish mold around the exterior of the food waste. In spots, it’s a bit fuzzy. That develops from two of the three most common bacteria used in EM, and is harmless. Some of the vegetable and fruit matter has wilted. The contents have sunk down by a couple inches, as can be seen from where the ring of bokashi bran shows higher up in the bucket.90003 90002 This is bokashi pre-compost, ready to stick into the ground. There are multiple options that you can do at this point with that pre-composted material. 90003 90002 You can opt to place it into a vermicomposter and let the worms go at it. Composting worms absolutely adore bokashi. If you do this, dig a hole in your worm composter bedding, place small amounts of pre-compost into it, and cover them back up. The worms will devour it quickly, and it will take a lot less time for the worms to eat this as opposed to fresh food.90003 90002 You can make a hole in your compost pile and add this to it, then cover it. The bokashi will break down at a highly-accelerated speed, becoming high-quality compost quickly. 90003 90002 You can make a soil factory. This is effectively a large box filled with regular garden soil, and you bury the bokashi in that. It will break down in there and disappear into the soil with good speed. 90003 90002 Or, you can opt to do what I did. 90003 90026 90011 Burying Your Pre-Compost 90012 90029 90002 I have brick-edged garden beds along the sides of my back yard.My soil is heavy clay, and so I soaked it down with water to loosen it up, then used a shovel to break it up a bit more. 90003 90002 At this point, it was time to dig a large hole. Putting the soil into my garden cart, I dug a hole that was about three feet across and about eight inches deep in preparation. 90003 90002 Once I had the hole prepared, I grabbed the bokashi bucket and hauled it out to the hole, and promptly upended it into the hole. Here, you can see the landscape fabric that had been on the bottom of the bucket, along with what looks like a whole lot of untouched food.And it’s right about now that you might be questioning why bokashi is worthwhile. Trust me, it is. I’ll get to that soon! 90003 90002 Pick out the fabric that you’d used as a bucket liner, and then rinse out the inside of the buckets, dumping the water in with your food waste. This helps you to clean out your buckets, but it also ensures that all of the EM that was inside the bucket is now in the hole with your pre-composted material. Make a slurry out of the food waste and the rinsing liquid, trying to spread it out fairly evenly throughout your hole.90003 90002 Begin adding the soil back into the hole. As you add it, be sure to mix the first few shovel loads through the food waste. You’re in essence making a food and mud puddle, and then covering that with the rest of the dry soil. By doing this, you’re ensuring that the host of natural bacteria that resides in your soil can reach all of your food waste. 90003 90002 Once you’ve finished filling in your hole, it’s time to wait. I dropped some mulch overtop of my bokashi burial site, mostly to be able to identify the exact area where I’d buried the bokashi later, and then left it alone.90003 90026 90011 How Long Does It Take For Pre-Compost To Become Compost? 90012 90029 90002 Four days after burying my pre-compost, I discovered a few thin sprouts popping up from where the bokashi had been buried. I pulled aside the mulch and poked around with a shovel for a moment. I was surprised to find that no matter how far I dug down, I could not find any of that material which I’d put in there four days earlier. There were sprouts, yes, and I’m guessing that they were from the cantaloupe seeds that I’d put in my bokashi bin.But other than those, there was not a whole lot left. 90003 90002 I removed the mulch over the area and actually dug it up a bit more. After some digging around, this is all I could find that remained. You can see one remnant of something greenish. I’m guessing it was a bit of onion skin that had not deteriorated as rapidly as the rest. There were a few sprouts, and a very light dusting of whitish mold in one area where the pre-compost had been spread a little thicker than the rest. Otherwise, the rest of the bokashi had completely disappeared within four days.It left behind darker, nutrient-enriched soil. 90003 90002 My bokashi had fermented for about a month without being touched before I buried it. It’s entirely possible that the longer fermentation period made the pre-compost break down in the soil faster than normal, but I do have to admit that I was startled by just how fast it vanished away. 90003 90002 The bokashi burial process can take anywhere from the quick four day period that I experienced to a more common average of a couple weeks. If you have bones in your bokashi pre-compost, those may also be around for longer.But as a general rule, most fruit or vegetable waste, bread or pasta or rice scraps, and even most meat and dairy products should break down within a couple weeks ‘time. 90003 90026 Final Thoughts On The Bokashi Process 90029 90002 Overall, my experience with bokashi has been incredibly positive. I’m keeping my food wastes out of the landfill and putting them to work in my garden instead. I’m slowly improving the quality of the soil in my garden beds, too. Other than initially building the bucket and occasionally burying a batch, the process takes no extra time.In fact, it’s actually a lot less work than turning a traditional compost pile! 90003 90002 If you’ve been considering bokashi composting, I can highly recommend it. It might not be for everyone, but it’s definitely something I plan on doing for a long time. It is not replacing my tumbler composter or my stationary composter, but it’s yet another option towards enriching my soil and improving my garden. 90003 90228 90002 Does this entice you to give bokashi composting a try? Doing a bokashi bucket DIY style is incredibly easy! Even if you use a commercial option, it’s worth giving it a shot.Have you tried making bokashi before? Tell us about it in the comments! 90003 90228 The Green Thumbs Behind This Article:.90000 I am studing couchbase, can anyone exlain what exactly is bucket and vbucket? 90001 Stack Overflow 90002 90003 Products 90004 90003 Customers 90004 90003 Use cases 90004 90009 90010 90003 Stack Overflow Public questions and answers 90004 90003 Teams Private questions and answers for your team 90004 90003 Enterprise Private self-hosted questions and answers for your enterprise 90004 90003 Jobs Programming and related technical career opportunities 90004 90003 Talent Hire technical talent 90004 90003 90004 90009.90000 How to make a Bucket of Cod in Minecraft 90001 90002 This Minecraft tutorial explains how to craft a bucket of cod with screenshots and step-by-step instructions. 90003 90002 In Minecraft, a bucket of cod is a water bucket that has been filled with cod that are still alive. This item can not be made with a crafting table or furnace. Instead, you need to find and gather this item in the game. 90003 90002 90003 90002 Let’s explore how to make a bucket of cod. 90003 90002 90011 Subscribe 90003 90013 Supported Platforms 90014 90002 A bucket of cod is available in the following versions of Minecraft: 90003 90002 * The version that it was added or removed, if applicable.90018 90019 NOTE: 90020 Pocket Edition (PE), Xbox One, PS4, Nintendo Switch, and Windows 10 Edition are now called Bedrock Edition. We will continue to show them individually for version history. 90003 90013 Where to find a Bucket of Cod in Creative Mode 90014 90024 Definitions 90025 90026 90027 90019 Platform 90020 is the platform that applies. 90030 90027 90019 Version (s) 90020 is the Minecraft version numbers where the item can be found in the menu location listed (90034 we have tested and confirmed this version number 90035).90030 90027 90019 Creative Menu Location 90020 is the location of the item in the Creative menu. 90030 90041 90013 Required Materials to make a Bucket of Cod 90014 90002 In Minecraft, these are the materials you can use to craft a bucket of cod: 90003 90013 How to get a Bucket of Cod in Survival Mode 90014 90002 You can add a bucket of cod to your inventory in Survival mode by catching a cod in a water bucket. So let’s get started! 90003 90050 1. Find a Cod 90051 90002 First, you need to find a cod in your Minecraft world.90003 90002 90055 90003 90002 If you are having trouble finding a cod, you can always summon a cod using a cheat or you can use a spawn egg. 90003 90050 2. Hold a Water Bucket 90051 90002 Next, select a water bucket in your hotbar so that you are holding it in your hand. 90003 90002 90003 90050 3. Use the Water Bucket on the Cod 90051 90002 While in front of the cod, use the water bucket on the cod. The game control to catch the cod in the water bucket depends on the version of Minecraft: 90003 90026 90027 For Java Edition (PC / Mac), right click on the cod.90030 90027 For Pocket Edition (PE), you tap on the cod. 90030 90027 For Xbox 360 and Xbox One, press the LT button on the Xbox controller. 90030 90027 For PS3 and PS4, press the L2 button on the PS controller. 90030 90027 For Wii U, press the ZL button on the gamepad. 90030 90027 For Nintendo Switch, press the ZL button on the controller. 90030 90027 For Windows 10 Edition, right click on the cod. 90030 90027 For Education Edition, right click on the cod. 90030 90041 90002 90003 90002 It may take several attempts to catch the cod in the water bucket.When you successfully catch the cod, you will see the message “Bucket of Cod” appear on the screen and your bucket will look like it has a cod inside. This cod is still alive and can be released from the bucket whenever you want. This is a great way to move cod around in the game. 90003 90002 Congratulations, you have made a bucket of cod in Minecraft! 90003 90013 Item ID and Name 90014 90026 90096 Java 90030 90098 PE 90030 90100 Xbox 90030 90102 PS 90030 90104 Nintendo 90030 90106 Win10 90030 90108 Edu 90030 90041 90050 Minecraft Java Edition (PC / Mac) 90051 90002 In Minecraft, a bucket of cod has the following Name, ID and DataValue: 90003 90115 90116 90117 Item 90118 90119 Description 90018 (90034 Minecraft ID Name 90035) 90118 90119 Minecraft 90018 ID 90118 90119 Minecraft 90018 Data 90018 Value 90118 90117 Platform 90118 90117 Version (s) 90118 90135 90116 90137 90138 90139 90137 Bucket of Cod 90018 (90034 minecraft: 90143 cod_ 90143 bucket 90145 90145 90035) 90139 90137 90139 90137 90139 90137 90154 Java Edition (PC / Mac) 90139 90137 1.13 – 1.16 90139 90135 90159 90002 See a complete list of Minecraft IDs that is interactive and searchable. 90003 90050 Minecraft Pocket Edition (PE) 90051 90002 In Minecraft, a bucket of cod has the following Name, ID and DataValue: 90003 90115 90116 90117 Item 90118 90119 Description 90018 (90034 Minecraft ID Name 90035) 90118 90119 Minecraft 90018 ID 90118 90119 Minecraft 90018 Data 90018 Value 90118 90117 Platform 90118 90117 Version (s) 90118 90135 90116 90137 90138 90139 90137 Bucket of Cod 90018 (90034 minecraft: 90143 bucket 90145 90035) 90139 90137 325 90139 90137 2 90139 90137 90203 Pocket Edition (PE) 90139 90137 1.4.0 – 1.16.0 90139 90135 90159 90002 See a complete list of Minecraft IDs that is interactive and searchable. 90003 90050 Minecraft Xbox One 90051 90002 In Minecraft, a bucket of cod has the following Name, ID and DataValue: 90003 90115 90116 90117 Item 90118 90119 Description 90018 (90034 Minecraft ID Name 90035) 90118 90119 Minecraft 90018 ID 90118 90119 Minecraft 90018 Data 90018 Value 90118 90117 Platform 90118 90117 Version (s) 90118 90135 90116 90137 90138 90139 90137 Bucket of Cod 90018 (90034 minecraft: 90143 bucket 90145 90035) 90139 90137 325 90139 90137 2 90139 90137 90252 Xbox One 90139 90137 1.6.0 – 1.16.0 90139 90135 90159 90002 See a complete list of Minecraft IDs that is interactive and searchable. 90003 90050 Minecraft PS4 90051 90002 In Minecraft, a bucket of cod has the following Name, ID and DataValue: 90003 90115 90116 90117 Item 90118 90119 Description 90018 (90034 Minecraft ID Name 90035) 90118 90119 Minecraft 90018 ID 90118 90119 Minecraft 90018 Data 90018 Value 90118 90117 Platform 90118 90117 Version (s) 90118 90135 90116 90137 90138 90139 90137 Bucket of Cod 90018 (90034 minecraft: 90143 bucket 90145 90035) 90139 90137 325 90139 90137 2 90139 90137 90301 PS4 90139 90137 1.14.0 – 1.16.0 90139 90135 90159 90002 See a complete list of Minecraft IDs that is interactive and searchable. 90003 90050 Minecraft Nintendo Switch 90051 90002 In Minecraft, a bucket of cod has the following Name, ID and DataValue: 90003 90115 90116 90117 Item 90118 90119 Description 90018 (90034 Minecraft ID Name 90035) 90118 90119 Minecraft 90018 ID 90118 90119 Minecraft 90018 Data 90018 Value 90118 90117 Platform 90118 90117 Version (s) 90118 90135 90116 90137 90138 90139 90137 Bucket of Cod 90018 (90034 minecraft: 90143 bucket 90145 90035) 90139 90137 325 90139 90137 2 90139 90137 90350 Nintendo Switch 90139 90137 1.6.0 – 1.16.0 90139 90135 90159 90002 See a complete list of Minecraft IDs that is interactive and searchable. 90003 90050 Minecraft Windows 10 Edition 90051 90002 In Minecraft, a bucket of cod has the following Name, ID and DataValue: 90003 90115 90116 90117 Item 90118 90119 Description 90018 (90034 Minecraft ID Name 90035) 90118 90119 Minecraft 90018 ID 90118 90119 Minecraft 90018 Data 90018 Value 90118 90117 Platform 90118 90117 Version (s) 90118 90135 90116 90137 90138 90139 90137 Bucket of Cod 90018 (90034 minecraft: 90143 bucket 90145 90035) 90139 90137 325 90139 90137 2 90139 90137 90399 Windows 10 Edition 90139 90137 1.4.0 – 1.16.0 90139 90135 90159 90002 See a complete list of Minecraft IDs that is interactive and searchable. 90003 90050 Minecraft Education Edition 90051 90002 In Minecraft, a bucket of cod has the following Name, ID and DataValue: 90003 90115 90116 90117 Item 90118 90119 Description 90018 (90034 Minecraft ID Name 90035) 90118 90119 Minecraft 90018 ID 90118 90119 Minecraft 90018 Data 90018 Value 90118 90117 Platform 90118 90117 Version (s) 90118 90135 90116 90137 90138 90139 90137 Bucket of Cod 90018 (90034 minecraft: 90143 bucket 90145 90035) 90139 90137 90139 90137 2 90139 90137 90448 Education Edition 90139 90137 1.4.0 – 1.12.60 90139 90135 90159 90002 See a complete list of Minecraft IDs that is interactive and searchable. 90003 90024 Definitions 90025 90026 90027 90019 Description 90020 is what the item is called and (90034 90019 Minecraft ID Name 90020 90035) is the string value that is used in game commands. 90030 90027 90019 Minecraft ID 90020 is the Internal number for the item. 90030 90027 90019 Minecraft DataValue 90020 (or damage value) identifies the variation of the block if more than one type exists for the Minecraft ID.90030 90027 90019 Platform 90020 is the platform that applies. 90030 90027 90019 Version (s) 90020 is the Minecraft version numbers that the Minecraft ID and Name are valid for. 90030 90041 90013 Give Command for Bucket of Cod 90014 90026 90096 Java 90030 90098 PE 90030 90100 Xbox 90030 90102 PS 90030 90104 Nintendo 90030 90106 Win10 90030 90108 Edu 90030 90041 90050 Give Command in Minecraft Java Edition (PC / Mac) 90051 90002 In Minecraft Java Edition (PC / Mac) 1.13, 1.14, 1.15 and 1.16, the / give command for Bucket of Cod is: 90003 90506 / give @p cod_bucket 1 90507 90050 Give Command in Minecraft Pocket Edition (PE) 90051 90002 In Minecraft Pocket Edition (PE) 1.4.0, 1.5.0, 1.6.0, 1.7.0, 1.8.0, 1.9.0, 1.10.0, 1.11.0, 1.12.0, 1.13.0, 1.14. 0 and 1.16.0, the / give command for Bucket of Cod is: 90003 90506 / give @p bucket 1 2 90507 90050 Give Command in Minecraft Xbox One 90051 90002 In Minecraft Xbox One 1.6.0, 1.7.0, 1.8.0, 1.9.0, 1.10.0, 1.11.0, 1.12.0, 1.13.0, 1.14.0 and 1.16.0, the / give command for Bucket of Cod is: 90003 90506 / give @p bucket 1 2 90507 90050 Give Command in Minecraft PS4 90051 90002 In Minecraft PS4 1.14.0 and 1.16.0, the / give command for Bucket of Cod is: 90003 90506 / give @p bucket 1 2 90507 90050 Give Command in Minecraft Nintendo Switch 90051 90002 In Minecraft Nintendo Switch 1.6.0, 1.7.0, 1.8.0, 1.9.0, 1.10.0, 1.11.0, 1.12.0, 1.13.0, 1.14.0 and 1.16.0, the / give command for Bucket of Cod is: 90003 90506 / give @p bucket 1 2 90507 90050 Give Command in Minecraft Windows 10 Edition 90051 90002 In Minecraft Windows 10 Edition 1.4.0, 1.5.0, 1.6.0, 1.7.0, 1.8.0, 1.9.0, 1.10.0, 1.11.0, 1.12.0, 1.13.0, 1.14.0 and 1.16.0, the / give command for Bucket of Cod is: 90003 90506 / give @p bucket 1 2 90507 90050 Give Command in Minecraft Education Edition 90051 90002 In Minecraft Education Edition 1.4.0, 1.7.0, 1.9.0, 1.12.0 and 1.12.60, the / give command for Bucket of Cod is: 90003 90506 / give @p bucket 1 2 90507 90013 Other Buckets 90014 90002 You can make other types of buckets in Minecraft such as: 90003 .90000 How to make a Bucket of Salmon in Minecraft 90001 90002 This Minecraft tutorial explains how to craft a bucket of salmon with screenshots and step-by-step instructions. 90003 90002 In Minecraft, a bucket of salmon is a water bucket that has been filled with salmon that are still alive. This item can not be made with a crafting table or furnace. Instead, you need to find and gather this item in the game. 90003 90002 90003 90002 Let’s explore how to make a bucket of salmon. 90003 90002 90011 Subscribe 90003 90013 Supported Platforms 90014 90002 A bucket of salmon is available in the following versions of Minecraft: 90003 90002 * The version that it was added or removed, if applicable.90018 90019 NOTE: 90020 Pocket Edition (PE), Xbox One, PS4, Nintendo Switch, and Windows 10 Edition are now called Bedrock Edition. We will continue to show them individually for version history. 90003 90013 Where to find a Bucket of Salmon in Creative Mode 90014 90024 Definitions 90025 90026 90027 90019 Platform 90020 is the platform that applies. 90030 90027 90019 Version (s) 90020 is the Minecraft version numbers where the item can be found in the menu location listed (90034 we have tested and confirmed this version number 90035).90030 90027 90019 Creative Menu Location 90020 is the location of the item in the Creative menu. 90030 90041 90013 Required Materials to make a Bucket of Salmon 90014 90002 In Minecraft, these are the materials you can use to craft a bucket of salmon: 90003 90013 How to get a Bucket of Salmon in Survival Mode 90014 90002 You can add a bucket of salmon to your inventory in Survival mode by catching a salmon in a water bucket. So let’s get started! 90003 90050 1. Find a Salmon 90051 90002 First, you need to find a salmon in your Minecraft world.90003 90002 90055 90003 90002 If you are having trouble finding a salmon, you can always summon a salmon using a cheat or you can use a spawn egg. 90003 90050 2. Hold a Water Bucket 90051 90002 Next, select a water bucket in your hotbar so that you are holding it in your hand. 90003 90002 90003 90050 3. Use the Water Bucket on the Salmon 90051 90002 While in front of the salmon, use the water bucket on the salmon. The game control to catch the salmon in the water bucket depends on the version of Minecraft: 90003 90026 90027 For Java Edition (PC / Mac), right click on the salmon.90030 90027 For Pocket Edition (PE), you tap on the salmon. 90030 90027 For Xbox 360 and Xbox One, press the LT button on the Xbox controller. 90030 90027 For PS3 and PS4, press the L2 button on the PS controller. 90030 90027 For Wii U, press the ZL button on the gamepad. 90030 90027 For Nintendo Switch, press the ZL button on the controller. 90030 90027 For Windows 10 Edition, right click on the salmon. 90030 90027 For Education Edition, right click on the salmon. 90030 90041 90002 90003 90002 It may take several attempts to catch the salmon in the water bucket.When you successfully catch the salmon, you will see the message “Bucket of Salmon” appear on the screen and your bucket will look like it has a salmon inside. This salmon is still alive and can be released from the bucket whenever you want. This is a great way to move salmon around in the game. 90003 90002 Congratulations, you have made a bucket of salmon in Minecraft! 90003 90013 Item ID and Name 90014 90026 90096 Java 90030 90098 PE 90030 90100 Xbox 90030 90102 PS 90030 90104 Nintendo 90030 90106 Win10 90030 90108 Edu 90030 90041 90050 Minecraft Java Edition (PC / Mac) 90051 90002 In Minecraft, a bucket of salmon has the following Name, ID and DataValue: 90003 90115 90116 90117 Item 90118 90119 Description 90018 (90034 Minecraft ID Name 90035) 90118 90119 Minecraft 90018 ID 90118 90119 Minecraft 90018 Data 90018 Value 90118 90117 Platform 90118 90117 Version (s) 90118 90135 90116 90137 90138 90139 90137 Bucket of Salmon 90018 (90034 minecraft: 90143 salmon_ 90143 bucket 90145 90145 90035) 90139 90137 90139 90137 90139 90137 90154 Java Edition (PC / Mac) 90139 90137 1.13 – 1.16 90139 90135 90159 90002 See a complete list of Minecraft IDs that is interactive and searchable. 90003 90050 Minecraft Pocket Edition (PE) 90051 90002 In Minecraft, a bucket of salmon has the following Name, ID and DataValue: 90003 90115 90116 90117 Item 90118 90119 Description 90018 (90034 Minecraft ID Name 90035) 90118 90119 Minecraft 90018 ID 90118 90119 Minecraft 90018 Data 90018 Value 90118 90117 Platform 90118 90117 Version (s) 90118 90135 90116 90137 90138 90139 90137 Bucket of Salmon 90018 (90034 minecraft: 90143 bucket 90145 90035) 90139 90137 325 90139 90137 3 90139 90137 90203 Pocket Edition (PE) 90139 90137 1.4.0 – 1.16.0 90139 90135 90159 90002 See a complete list of Minecraft IDs that is interactive and searchable. 90003 90050 Minecraft Xbox One 90051 90002 In Minecraft, a bucket of salmon has the following Name, ID and DataValue: 90003 90115 90116 90117 Item 90118 90119 Description 90018 (90034 Minecraft ID Name 90035) 90118 90119 Minecraft 90018 ID 90118 90119 Minecraft 90018 Data 90018 Value 90118 90117 Platform 90118 90117 Version (s) 90118 90135 90116 90137 90138 90139 90137 Bucket of Salmon 90018 (90034 minecraft: 90143 bucket 90145 90035) 90139 90137 325 90139 90137 3 90139 90137 90252 Xbox One 90139 90137 1.6.0 – 1.16.0 90139 90135 90159 90002 See a complete list of Minecraft IDs that is interactive and searchable. 90003 90050 Minecraft PS4 90051 90002 In Minecraft, a bucket of salmon has the following Name, ID and DataValue: 90003 90115 90116 90117 Item 90118 90119 Description 90018 (90034 Minecraft ID Name 90035) 90118 90119 Minecraft 90018 ID 90118 90119 Minecraft 90018 Data 90018 Value 90118 90117 Platform 90118 90117 Version (s) 90118 90135 90116 90137 90138 90139 90137 Bucket of Salmon 90018 (90034 minecraft: 90143 bucket 90145 90035) 90139 90137 325 90139 90137 3 90139 90137 90301 PS4 90139 90137 1.14.0 – 1.16.0 90139 90135 90159 90002 See a complete list of Minecraft IDs that is interactive and searchable. 90003 90050 Minecraft Nintendo Switch 90051 90002 In Minecraft, a bucket of salmon has the following Name, ID and DataValue: 90003 90115 90116 90117 Item 90118 90119 Description 90018 (90034 Minecraft ID Name 90035) 90118 90119 Minecraft 90018 ID 90118 90119 Minecraft 90018 Data 90018 Value 90118 90117 Platform 90118 90117 Version (s) 90118 90135 90116 90137 90138 90139 90137 Bucket of Salmon 90018 (90034 minecraft: 90143 bucket 90145 90035) 90139 90137 325 90139 90137 3 90139 90137 90350 Nintendo Switch 90139 90137 1.6.0 – 1.16.0 90139 90135 90159 90002 See a complete list of Minecraft IDs that is interactive and searchable. 90003 90050 Minecraft Windows 10 Edition 90051 90002 In Minecraft, a bucket of salmon has the following Name, ID and DataValue: 90003 90115 90116 90117 Item 90118 90119 Description 90018 (90034 Minecraft ID Name 90035) 90118 90119 Minecraft 90018 ID 90118 90119 Minecraft 90018 Data 90018 Value 90118 90117 Platform 90118 90117 Version (s) 90118 90135 90116 90137 90138 90139 90137 Bucket of Salmon 90018 (90034 minecraft: 90143 bucket 90145 90035) 90139 90137 325 90139 90137 3 90139 90137 90399 Windows 10 Edition 90139 90137 1.4.0 – 1.16.0 90139 90135 90159 90002 See a complete list of Minecraft IDs that is interactive and searchable. 90003 90050 Minecraft Education Edition 90051 90002 In Minecraft, a bucket of salmon has the following Name, ID and DataValue: 90003 90115 90116 90117 Item 90118 90119 Description 90018 (90034 Minecraft ID Name 90035) 90118 90119 Minecraft 90018 ID 90118 90119 Minecraft 90018 Data 90018 Value 90118 90117 Platform 90118 90117 Version (s) 90118 90135 90116 90137 90138 90139 90137 Bucket of Salmon 90018 (90034 minecraft: 90143 bucket 90145 90035) 90139 90137 90139 90137 3 90139 90137 90448 Education Edition 90139 90137 1.4.0 – 1.12.60 90139 90135 90159 90002 See a complete list of Minecraft IDs that is interactive and searchable. 90003 90024 Definitions 90025 90026 90027 90019 Description 90020 is what the item is called and (90034 90019 Minecraft ID Name 90020 90035) is the string value that is used in game commands. 90030 90027 90019 Minecraft ID 90020 is the Internal number for the item. 90030 90027 90019 Minecraft DataValue 90020 (or damage value) identifies the variation of the block if more than one type exists for the Minecraft ID.90030 90027 90019 Platform 90020 is the platform that applies. 90030 90027 90019 Version (s) 90020 is the Minecraft version numbers that the Minecraft ID and Name are valid for. 90030 90041 90013 Give Command for Bucket of Salmon 90014 90026 90096 Java 90030 90098 PE 90030 90100 Xbox 90030 90102 PS 90030 90104 Nintendo 90030 90106 Win10 90030 90108 Edu 90030 90041 90050 Give Command in Minecraft Java Edition (PC / Mac) 90051 90002 In Minecraft Java Edition (PC / Mac) 1.13, 1.14, 1.15 and 1.16, the / give command for Bucket of Salmon is: 90003 90506 / give @p salmon_bucket 1 90507 90050 Give Command in Minecraft Pocket Edition (PE) 90051 90002 In Minecraft Pocket Edition (PE) 1.4.0, 1.5.0, 1.6.0, 1.7.0, 1.8.0, 1.9.0, 1.10.0, 1.11.0, 1.12.0, 1.13.0, 1.14. 0 and 1.16.0, the / give command for Bucket of Salmon is: 90003 90506 / give @p bucket 1 3 90507 90050 Give Command in Minecraft Xbox One 90051 90002 In Minecraft Xbox One 1.6.0, 1.7.0, 1.8.0, 1.9.0, 1.10.0, 1.11.0, 1.12.0, 1.13.0, 1.14.0 and 1.16.0, the / give command for Bucket of Salmon is: 90003 90506 / give @p bucket 1 3 90507 90050 Give Command in Minecraft PS4 90051 90002 In Minecraft PS4 1.14.0 and 1.16.0, the / give command for Bucket of Salmon is: 90003 90506 / give @p bucket 1 3 90507 90050 Give Command in Minecraft Nintendo Switch 90051 90002 In Minecraft Nintendo Switch 1.6.0, 1.7.0, 1.8.0, 1.9.0, 1.10.0, 1.11.0, 1.12.0, 1.13.0, 1.14.0 and 1.16.0, the / give command for Bucket of Salmon is: 90003 90506 / give @p bucket 1 3 90507 90050 Give Command in Minecraft Windows 10 Edition 90051 90002 In Minecraft Windows 10 Edition 1.4.0, 1.5.0, 1.6.0, 1.7.0, 1.8.0, 1.9.0, 1.10.0, 1.11.0, 1.12.0, 1.13.0, 1.14.0 and 1.16.0, the / give command for Bucket of Salmon is: 90003 90506 / give @p bucket 1 3 90507 90050 Give Command in Minecraft Education Edition 90051 90002 In Minecraft Education Edition 1.4.0, 1.7.0, 1.9.0, 1.12.0 and 1.12.60, the / give command for Bucket of Salmon is: 90003 90506 / give @p bucket 1 3 90507 90013 Other Buckets 90014 90002 You can make other types of buckets in Minecraft such as: 90003 .

Автор: alexxlab

Добавить комментарий

Ваш адрес email не будет опубликован. Обязательные поля помечены *